Imagine harnessing the power of the sun to keep your power tools humming. No more scrambling for outlets or dealing with tangled cords – just clean, renewable energy powering your projects. Sounds good, right?
The usual scenario involves extension cords stretching across the yard, the frustrating search for a free outlet in the garage, or the nagging feeling that you're racking up a hefty electricity bill every time you tackle a DIY project. It would be great if you could minimize your carbon footprint. It's time to find a better way!
This guide provides a comprehensive, step-by-step approach to building your own solar-powered charging station for power tool batteries. We'll cover everything from selecting the right components to safely connecting them and monitoring your system's performance. So, whether you're a seasoned DIY enthusiast or just starting out, this guide will empower you to embrace sustainable energy and keep your tools ready for action.
We'll explore how to build a DIY solar charging system, focusing on essential components like solar panels, charge controllers, and battery adapters. We will also touch on understanding battery compatibility, safety measures, and troubleshooting tips, you'll be well-equipped to create a reliable and eco-friendly power source for your cordless tools. It’s about maximizing efficiency, minimizing environmental impact, and saving money in the long run, all while enjoying the satisfaction of a successful DIY project.
My Personal Journey to Solar-Powered Tools
My journey into solar-powered tool charging started with a simple desire: to reduce my reliance on the grid and minimize my impact on the environment. I live in a rural area, and the nearest outlet can sometimes feel miles away when I'm working on a project in the far reaches of my property. I was tired of dragging extension cords and constantly worrying about running out of battery power in the middle of a job. I started researching solar panels, charge controllers, and battery adapters. There was a bit of trial and error, I'll admit. My first attempt involved mismatched components and resulted in a rather underwhelming charging experience. But I learned from my mistakes, refined my design, and eventually built a system that reliably charges all my power tool batteries.
The key to success is understanding the power requirements of your tools and selecting components that can meet those needs. Don't skimp on the charge controller; it's the brain of the system and ensures that your batteries are charged safely and efficiently. And always prioritize safety by using appropriate wiring and connectors and following all recommended safety precautions. By following these steps, you can create a solar-powered charging station that will keep your tools humming for years to come.
Understanding the Basics of Solar Power
Solar power, at its core, is the conversion of sunlight into electricity. This is achieved through photovoltaic (PV) cells, which are the building blocks of solar panels. When sunlight strikes these cells, it creates an electrical current that can be harnessed and used to power various devices, including your power tool batteries.
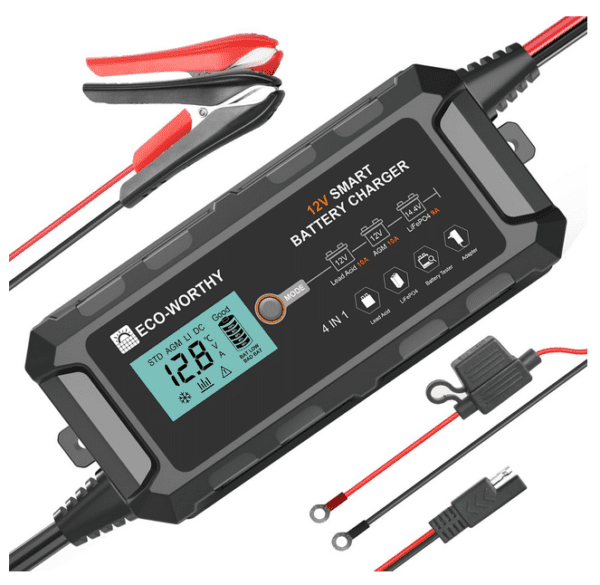
The process involves several key components working together. Solar panels capture sunlight and convert it into direct current (DC) electricity. A charge controller regulates the flow of electricity from the solar panels to the battery, preventing overcharging and ensuring that the battery is charged safely and efficiently. A battery adapter is then used to connect the battery to the charge controller, allowing it to receive the electrical charge. Understanding these basic principles is crucial for building a successful solar-powered charging system.
Selecting the right components is also essential. Consider the voltage and amperage requirements of your power tool batteries and choose solar panels, charge controllers, and battery adapters that are compatible. It's also important to factor in the amount of sunlight you receive in your area. More sunlight means more power, so you may need larger solar panels or a more efficient charge controller to meet your charging needs.
The History and Myths of Solar Charging
The history of solar power dates back to the 19th century when scientists first discovered the photovoltaic effect. However, it wasn't until the mid-20th century that solar cells became practical for powering devices. Initially, solar power was primarily used in space exploration, but as technology advanced and costs decreased, it began to be adopted for terrestrial applications.
One common myth about solar charging is that it's only effective in sunny climates. While it's true that direct sunlight is ideal, solar panels can still generate electricity on cloudy days, albeit at a reduced rate. Another myth is that solar power is too expensive to be practical. While the initial investment may be higher than traditional charging methods, the long-term savings in electricity costs can more than offset the upfront expenses. Furthermore, the environmental benefits of solar power are undeniable, making it a sustainable and responsible choice. The idea that DIY solar charging is too complex for the average person is also a misconception. With the right guidance and a little bit of effort, anyone can build a functional and efficient solar-powered charging system for their power tool batteries.
Unlocking the Secrets to Efficient Solar Charging
The secret to efficient solar charging lies in optimizing every aspect of your system, from the selection of components to the placement of your solar panels. One key factor is to choose high-efficiency solar panels that can convert a larger percentage of sunlight into electricity. Another important consideration is the charge controller. Look for a charge controller with maximum power point tracking (MPPT) technology, which can maximize the amount of power harvested from the solar panels.
Proper placement of your solar panels is also crucial. Ideally, they should be positioned to face the sun directly throughout the day. In the northern hemisphere, this typically means facing south. You may also need to adjust the angle of the panels seasonally to account for changes in the sun's position. Regularly cleaning your solar panels can also improve their efficiency. Dust, dirt, and debris can accumulate on the surface of the panels, reducing their ability to absorb sunlight. A simple rinse with water and a soft brush can make a big difference. Finally, make sure that all of your connections are secure and properly insulated to prevent energy loss.
Recommendations for Building Your Solar Charger
When building your solar charger, consider these recommendations: Choose high-quality components from reputable brands. While it may be tempting to save money by opting for cheaper alternatives, the long-term cost of replacing faulty or inefficient components can be higher. Invest in a charge controller with MPPT technology for maximum power harvesting. Ensure that your solar panels are properly sized to meet the power requirements of your power tool batteries.
Use appropriate wiring and connectors to ensure safe and efficient electrical connections. Position your solar panels in a location that receives ample sunlight throughout the day. Regularly inspect and maintain your system to ensure optimal performance. Consider adding a battery monitor to track the state of charge of your batteries. Don't forget to factor in the environmental conditions in your area, such as temperature and humidity, when selecting components. Finally, always prioritize safety by following all recommended safety precautions and consulting with a qualified electrician if you have any doubts or concerns.
Step-by-Step Guide to Building Your Solar Charger
Building your own solar charger is a rewarding project that can save you money and reduce your environmental impact. Start by gathering the necessary components: solar panel(s), a charge controller, a battery adapter, wiring, connectors, and a multimeter. Next, determine the power requirements of your power tool batteries and select solar panels that can provide sufficient power to charge them. The charge controller is the brain of your system. It regulates the flow of electricity from the solar panels to the battery, preventing overcharging and ensuring safe and efficient charging. Connect the solar panel(s) to the charge controller, following the manufacturer's instructions carefully. Use appropriate wiring and connectors to ensure secure and reliable connections. Connect the battery adapter to the charge controller. This adapter will allow you to connect your power tool batteries to the charging system. Test the system with a multimeter to ensure that the solar panels are generating electricity and that the charge controller is functioning properly. Monitor the charging process to ensure that the batteries are charging at the correct rate and that they are not being overcharged. With a little bit of effort and attention to detail, you can build a solar charger that will provide you with a reliable and sustainable power source for your power tools.
Essential Tips for Maximizing Efficiency and Safety
To maximize the efficiency of your solar charging system, consider these tips: Regularly clean your solar panels to remove dust, dirt, and debris that can reduce their ability to absorb sunlight. Position your solar panels to face the sun directly throughout the day. Adjust the angle of the panels seasonally to account for changes in the sun's position. Use a charge controller with MPPT technology to maximize power harvesting. Choose high-quality wiring and connectors to minimize energy loss.
Ensure that all connections are secure and properly insulated. Use a battery monitor to track the state of charge of your batteries. Avoid overcharging your batteries, as this can shorten their lifespan. Store your batteries in a cool, dry place when not in use. Always follow the manufacturer's instructions for charging and storing your batteries. Prioritize safety by wearing appropriate personal protective equipment (PPE) when working with electrical components. Work in a well-ventilated area to avoid exposure to fumes. Disconnect the power supply before working on any electrical connections. Consult with a qualified electrician if you have any doubts or concerns.
Safety First: Protecting Yourself and Your Equipment
Safety should always be your top priority when working with electrical components and solar panels. Start by wearing appropriate personal protective equipment (PPE), including safety glasses, gloves, and insulated footwear. Work in a well-ventilated area to avoid exposure to fumes from soldering or other processes. Disconnect the power supply before working on any electrical connections. Use insulated tools to prevent electrical shock. Be careful when handling solar panels, as they can be fragile and easily damaged. Avoid touching the electrical contacts on the back of the panels, as they may be carrying a voltage. Never work on your solar charging system during wet weather. Store batteries in a cool, dry place away from flammable materials. Use a fuse or circuit breaker to protect your system from overcurrents. Regularly inspect your system for any signs of damage or wear. If you notice any problems, disconnect the power supply and consult with a qualified electrician.
Fun Facts About Solar Power and Power Tools
Did you know that the first solar cell was invented in 1883 by Charles Fritts? It was made from selenium coated with a thin layer of gold. While it wasn't very efficient, it paved the way for modern solar technology. Power tools have come a long way since their invention. The first electric drill was patented in 1889 by Arthur James Arnot and William Blanch Brain. It was designed for drilling rock in coal mines. Cordless power tools have revolutionized the way we work, allowing us to tackle projects in remote locations without the need for extension cords. Solar power is becoming increasingly popular for powering homes and businesses, as well as for charging electric vehicles and other devices. Solar panels can last for 25 years or more, making them a long-term investment in clean energy. The amount of solar energy that reaches the Earth in one hour is enough to power the entire planet for a year. Solar power is a sustainable and renewable energy source that can help reduce our reliance on fossil fuels. The cost of solar panels has decreased dramatically in recent years, making solar power more accessible to everyone. Solar power is a versatile technology that can be used in a wide range of applications, from powering small electronic devices to powering entire cities.
A Step-by-Step Guide to Building Your Solar Charger
Building your own solar charger for power tool batteries involves a few key steps. First, gather your materials: a solar panel (rated appropriately for your battery voltage), a charge controller (essential for preventing overcharging), a battery adapter (to connect the controller to your battery), wiring, and connectors. Determine the voltage of your power tool batteries and select a solar panel that provides a compatible voltage. Next, wire the solar panel to the charge controller, ensuring correct polarity (+ to + and - to -). Then, connect the battery adapter to the charge controller, again paying attention to polarity. Finally, connect your power tool battery to the adapter. Monitor the charging process using a multimeter to check the voltage and current. Ensure the charge controller is properly regulating the charging process to prevent damage to your battery. Remember to position the solar panel in direct sunlight for optimal charging. With careful planning and execution, you can create a reliable solar charger for your power tool batteries.
What If Things Go Wrong? Troubleshooting Your Solar Charger
Even with careful planning, things can sometimes go wrong with your DIY solar charger. If your battery isn't charging, start by checking all connections. Ensure they are secure and properly wired. Use a multimeter to test the voltage of the solar panel in direct sunlight. If the voltage is significantly lower than its rated voltage, the panel may be damaged. Verify that the charge controller is functioning correctly. Check its display for any error messages or unusual readings. Ensure that the battery adapter is compatible with your power tool battery. An incompatible adapter may prevent the battery from charging. Also, test the battery itself to ensure it's not damaged or completely discharged. If the battery is old, it may be nearing the end of its lifespan and unable to hold a charge. Double-check the polarity of all connections. Incorrect polarity can prevent charging and potentially damage the battery or charge controller. With systematic troubleshooting, you can identify and resolve most issues with your solar charger.
Top 5 Benefits of Solar Charging Your Power Tool Batteries
Here are five compelling reasons to embrace solar charging for your power tool batteries:
1.Environmentally Friendly: Solar power is a clean, renewable energy source that reduces your carbon footprint.
2.Cost Savings: By using solar power, you can significantly reduce your electricity bills.
3.Convenience: No more searching for outlets or dealing with tangled extension cords.
4.Portability: A solar charger allows you to charge your batteries in remote locations.
5.Self-Sufficiency: You become less reliant on the grid, giving you greater energy independence.
Question and Answer
Q: What size solar panel do I need to charge my power tool battery?
A: The size of the solar panel depends on the voltage and amperage of your battery. Check the battery specifications and choose a solar panel with a compatible voltage and enough wattage to provide a sufficient charging current.
Q: Do I really need a charge controller?
A: Yes, a charge controller is essential. It prevents overcharging, which can damage your battery and shorten its lifespan.
Q: Can I use any type of battery adapter?
A: No, you need a battery adapter that is specifically designed for your power tool battery. Using an incompatible adapter can damage the battery or the charger.
Q: What if I live in a cloudy area? Will solar charging still work?
A: Yes, solar panels can still generate electricity on cloudy days, but the charging rate will be lower. You may need a larger solar panel or a longer charging time to fully charge your batteries.
Conclusion of Charge a Power Tool Battery With Solar: Step-by-Step DIY
Embracing solar power for your power tool batteries is a practical and rewarding step towards sustainability. By following this step-by-step guide, you can build a reliable and efficient solar charging system that reduces your environmental impact, saves you money on electricity bills, and provides you with a convenient and portable power source for your tools. Remember to prioritize safety, choose high-quality components, and regularly maintain your system for optimal performance. With a little effort and ingenuity, you can harness the power of the sun to keep your tools humming for years to come.