Imagine this: you're miles from civilization, trekking through stunning landscapes, but your phone's battery is flashing that dreaded red line. The perfect photo op is just ahead, but your camera's dead. Sounds familiar? Let's explore a solution that puts the power back in your hands – literally!
We've all been there, haven't we? Stranded with devices that are about to die just when we need them most. Relying solely on power banks can feel limiting, like you're just delaying the inevitable. And those bulky, pre-made solar chargers? They can be expensive and not always the most convenient to lug around on your adventures.
This guide is for the adventurers, the budget-conscious, the environmentally aware, and the DIY enthusiasts! We're diving into the world of creating your own folding solar charger, perfect for backpacks and travel. This project allows you to harness the sun's energy to keep your devices charged while on the go, offering freedom, sustainability, and a satisfying sense of accomplishment.
In this post, we'll cover everything from the materials you'll need and the step-by-step construction process, to exploring the history and secrets of solar charging and offering tips for optimizing your design. You'll discover the fun facts, the what-ifs, and a handy listicle to guide you along the way. By the end, you'll be equipped to build your own portable power source, ready to tackle any adventure with confidence. So, let's get started building your own DIY folding solar charger, solar panels, and sustainable energy for your next outdoor adventure!
My Solar Charging Revelation on the Appalachian Trail
My own interest in DIY solar chargers sparked during a backpacking trip on the Appalachian Trail. I'd meticulously planned my gear, packed light, and downloaded all the necessary maps and trail guides onto my phone. About three days in, disaster struck: a faulty power bank left me with a rapidly draining phone and the unsettling realization that I was relying on a soon-to-be-dead device for navigation. I ran into another hiker who was using a homemade solar charger, a series of small panels sewn onto a folding fabric. He happily charged my phone for long enough to get me to the next town. I couldn't believe how cool and useful it was to have your own portable source of power like that.
That experience was a game-changer. I knew I had to learn how to build my own. When I returned home, I immediately began researching solar panels, voltage regulators, and suitable fabrics. It was a journey of trial and error, filled with burnt fingers from soldering and frustrating moments when the charger wouldn't quite deliver the expected power. But with each iteration, I learned more, refined my design, and eventually created a reliable, lightweight folding solar charger that has accompanied me on countless adventures since. The satisfaction of knowing I built something that empowers me to stay connected and safe in the wilderness is unmatched. The goal of this guide is to help you have a similar experience. This isn't just about saving money, it's about understanding how your tech works, reducing your carbon footprint, and gaining a new appreciation for the power of the sun. Solar energy, DIY projects, and sustainable living are all within your reach!
What Exactly Isa DIY Folding Solar Charger?
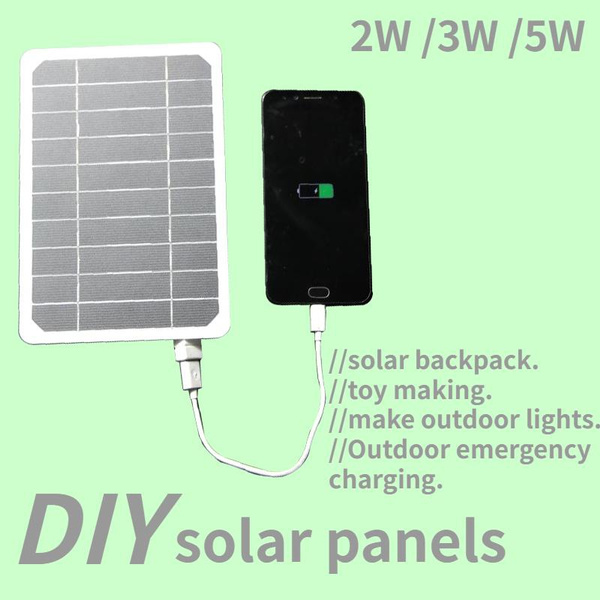
At its core, a DIY folding solar charger is a portable power source constructed by combining individual solar panels into a compact, foldable design. Unlike commercially available solar chargers that are often enclosed in rigid casings, a DIY version allows for customization in terms of size, power output, and overall portability. The "folding" aspect is key – it enables you to collapse the charger into a smaller, more manageable form factor for easy storage in a backpack or travel bag. It's essentially your own mini portable power station.
The typical DIY folding solar charger consists of several essential components: solar panels (typically small, lightweight monocrystalline or polycrystalline panels), a fabric backing (such as ripstop nylon or canvas), conductive thread or wiring to connect the panels in series or parallel (depending on the desired voltage and current), a voltage regulator (to protect your devices from overcharging), and a USB port for connecting your devices.
The beauty of this project lies in its adaptability. You can choose the number of solar panels to use based on your power needs and the available sunlight. The fabric backing provides a flexible and durable platform for mounting the panels, while the folding design allows for easy deployment and storage. The voltage regulator is a crucial safety component that ensures your devices receive a stable and safe charging current.
In essence, a DIY folding solar charger is a personalized, sustainable solution for keeping your devices powered up while on the move. It's a blend of electronics, craftsmanship, and a passion for harnessing renewable energy.
A Brief History & The Myth of Solar Charging
The history of solar charging is intertwined with the broader development of solar technology itself. The story begins in the late 19th century with the discovery of the photovoltaic effect by Alexandre-Edmond Becquerel in 1839. However, it wasn't until the mid-20th century that practical solar cells were developed, largely driven by the space race and the need for reliable power sources for satellites.
In the early days, solar cells were expensive and inefficient, limiting their use to specialized applications. As technology advanced and manufacturing processes improved, the cost of solar cells gradually decreased, opening up new possibilities for terrestrial applications, including portable solar charging.
The myth surrounding solar charging often centers on the idea that it's a highly complex and inaccessible technology. Many people believe that building a solar charger requires advanced engineering skills and specialized equipment. However, with the availability of affordable solar panels, user-friendly voltage regulators, and online resources, creating a DIY solar charger has become surprisingly accessible to hobbyists and DIY enthusiasts.
Another common misconception is that solar chargers are only effective in direct sunlight. While direct sunlight certainly provides the optimal charging conditions, solar panels can still generate power in diffuse light, albeit at a reduced rate. Understanding these myths and realities is essential for setting realistic expectations and maximizing the performance of your DIY solar charger. By demystifying the technology and providing clear instructions, we aim to empower individuals to harness the power of the sun and create their own sustainable energy solutions. Solar power, sustainable technology, renewable energy: it's all within reach!
Unveiling the Hidden Secrets of Efficient Solar Charging
The secret to building a truly effective DIY folding solar charger lies in understanding the nuances of solar panel selection, circuit design, and environmental factors. It's not just about slapping some panels together and hoping for the best; it's about optimizing every aspect of the design to maximize power output and efficiency.
One often overlooked secret is the importance of panel orientation. The angle at which sunlight strikes the solar panel significantly affects its performance. Ideally, you want the panel to be perpendicular to the sun's rays. This means adjusting the panel's position throughout the day to track the sun's movement. A simple tilt mechanism or even just propping the charger against a rock can make a noticeable difference.
Another key factor is shading. Even partial shading of a solar panel can drastically reduce its output. This is because solar panels are typically connected in series, and the weakest panel in the chain will limit the overall performance. Therefore, it's crucial to ensure that all panels are fully exposed to sunlight.
Furthermore, understanding the voltage and current requirements of your devices is essential for selecting the appropriate voltage regulator. A mismatch between the regulator and the device can lead to inefficient charging or even damage.
Finally, consider the impact of temperature on solar panel performance. Solar panels actually become less efficient as they heat up. Therefore, it's important to provide adequate ventilation to prevent overheating, especially in hot climates. By paying attention to these hidden secrets, you can significantly improve the performance and reliability of your DIY folding solar charger. This is more than just a project; it's a lesson in applied physics and sustainable energy principles.
Recommendations for Your DIY Solar Charger Project
Choosing the right components is crucial for a successful DIY solar charger. For solar panels, consider monocrystalline panels for their high efficiency and relatively small size. Polycrystalline panels are a more budget-friendly option, but they are generally less efficient. Look for panels with a voltage rating that is compatible with your intended charging voltage (typically 5V for USB devices).
For the fabric backing, ripstop nylon is an excellent choice due to its lightweight, durability, and resistance to tearing. Canvas is another option, offering greater robustness but at the expense of increased weight. Choose a fabric that is easy to sew and can withstand the rigors of outdoor use.
Selecting a suitable voltage regulator is paramount for protecting your devices from overcharging. Look for a regulator with a high efficiency rating and built-in protection features such as over-voltage and over-current protection.
When connecting the solar panels, consider using conductive thread or thin gauge wiring. Conductive thread is easy to sew and provides a flexible connection, while wiring offers a more robust and reliable connection. Ensure that all connections are properly insulated to prevent short circuits.
Finally, don't forget about the little details, such as choosing a high-quality USB port and using durable zippers or Velcro closures for the folding mechanism. By investing in quality components and paying attention to the details, you can create a DIY solar charger that is both functional and durable. This is about making something that lasts, and that you can be proud of using!
Understanding Solar Panel Configurations: Series vs. Parallel
The way you connect your solar panels – in series or parallel – significantly impacts the voltage and current output of your DIY charger. A series configuration increases the voltage while maintaining the same current, whereas a parallel configuration increases the current while maintaining the same voltage.
Think of it like batteries. If you connect batteries in series, you are increasing the total voltage, which can provide more power for certain devices. If you connect batteries in parallel, you are increasing the total current, which can allow you to draw power for longer.
For most USB-based devices, you'll need a voltage around 5V. So, if your solar panels individually produce less than 5V, you'll likely need to connect them in series to achieve the desired voltage. However, if your panels already produce close to 5V, connecting them in parallel can increase the charging current, which can speed up the charging process.
The best configuration for your DIY charger depends on the specific characteristics of your solar panels and the voltage and current requirements of your devices. Experimentation and testing are key to finding the optimal configuration for your needs. Understanding the principles of series and parallel circuits will empower you to design a solar charger that is perfectly tailored to your requirements. It's all about understanding the science to get the most out of your project!
Essential Tips for Maximizing Your Solar Charger's Performance
Building a DIY solar charger is one thing, but optimizing its performance is another. Here are some essential tips to help you get the most out of your creation:
Sun Tracking: The sun's angle changes throughout the day. To maximize power output, try to position your solar charger so that it's directly facing the sun. Even small adjustments can make a significant difference.
Panel Cleaning: Dust, dirt, and grime can accumulate on the surface of your solar panels, reducing their efficiency. Regularly clean your panels with a soft cloth and water to keep them performing at their best.
Ventilation: Solar panels generate heat when exposed to sunlight. Excessive heat can reduce their efficiency. Provide adequate ventilation to prevent overheating, especially in hot climates.
Cable Management: Use short, high-quality cables to minimize voltage drop and ensure efficient power transfer. Avoid using long, thin cables, as they can significantly reduce charging speed.
Testing and Monitoring: Regularly test your solar charger's output with a multimeter to ensure that it's performing as expected. Monitor the charging process of your devices to identify any issues.
Storage: When not in use, store your solar charger in a cool, dry place away from direct sunlight. This will help prolong the lifespan of the panels and other components.
By following these tips, you can ensure that your DIY solar charger delivers reliable and efficient power for years to come. These simple changes can make a big difference. Solar performance, efficiency improvements, power optimization: all achievable with a little effort.
Understanding Voltage Regulators: A Crucial Component
The voltage regulator is a critical component of any solar charger, as it protects your devices from overcharging and voltage fluctuations. Without a voltage regulator, the voltage from the solar panels could potentially damage your devices.
A voltage regulator works by stepping down the voltage from the solar panels to a safe and stable level, typically 5V for USB devices. It also prevents overcharging by cutting off the power supply once the device's battery is full.
When selecting a voltage regulator, consider the following factors:
Input Voltage: The maximum voltage that the regulator can handle from the solar panels.
Output Voltage: The regulated voltage that the regulator will output to your devices.
Current Capacity: The maximum current that the regulator can deliver to your devices.
Efficiency: The percentage of power that the regulator converts from the input voltage to the output voltage. A higher efficiency rating means less power is wasted as heat.
Protection Features: Look for regulators with built-in protection features such as over-voltage protection, over-current protection, and short-circuit protection.
By choosing a suitable voltage regulator, you can ensure the safety and longevity of your devices while maximizing the efficiency of your solar charger. It's the unsung hero of your portable power system.
Fun Facts About Solar Energy and Your DIY Charger
Did you know that the amount of solar energy that strikes the Earth in one hour is enough to power the entire world for a year? That's a staggering amount of clean, renewable energy just waiting to be harnessed. Your DIY solar charger is a small but significant step towards tapping into that potential.
Here's another fun fact: the first solar cells were incredibly inefficient, converting only a tiny fraction of sunlight into electricity. Today, modern solar panels can achieve efficiencies of over 20%, and researchers are constantly working to develop even more efficient technologies.
Building your own solar charger also offers a unique opportunity to understand the science behind solar energy. You can experiment with different panel configurations, voltage regulators, and materials to see how they affect the charger's performance. It's a hands-on learning experience that can spark a lifelong interest in renewable energy.
And finally, consider the environmental impact of your DIY solar charger. By harnessing the power of the sun, you're reducing your reliance on fossil fuels and helping to create a more sustainable future. It's a small but meaningful contribution to a cleaner planet. Solar facts, sustainable energy facts, DIY project benefits: it's all interconnected!
Step-by-Step: How to Build Your Own Folding Solar Charger
Alright, let's get down to the nitty-gritty. Here's a simplified step-by-step guide to building your own folding solar charger:
Gather Your Materials: You'll need solar panels, fabric backing, conductive thread or wiring, a voltage regulator, a USB port, sewing supplies, and a soldering iron.
Prepare the Fabric: Cut two pieces of fabric to the desired size for your folded charger. Sew them together along three sides, leaving one side open to create a pouch.
Arrange the Solar Panels: Position the solar panels on the fabric, leaving space between them for folding.
Connect the Panels: Connect the solar panels in series or parallel, depending on your desired voltage and current output. Use conductive thread or wiring to make the connections. Solder the connections for a more secure bond.
Install the Voltage Regulator: Connect the output of the solar panels to the input of the voltage regulator.
Install the USB Port: Connect the output of the voltage regulator to the USB port.
Sew the Panels to the Fabric: Carefully sew the solar panels to the fabric backing, ensuring that the connections are secure.
Close the Pouch: Sew the remaining side of the fabric pouch closed, leaving a small opening for access to the USB port.
Test and Refine: Test your solar charger with a multimeter and a USB device to ensure that it's working properly. Refine the design as needed to optimize performance.
Remember to exercise caution when working with electricity and soldering irons. Always wear safety glasses and work in a well-ventilated area. Don't be afraid to experiment and customize the design to suit your specific needs. With a little patience and creativity, you can build a solar charger that is both functional and aesthetically pleasing. Step-by-step instructions, project guide, DIY power source: let's build something amazing!
What If Your DIY Solar Charger Isn't Working? Troubleshooting Tips
So, you've built your solar charger, but it's not quite working as expected? Don't panic! Here are some common troubleshooting tips to help you diagnose and fix the problem:
Check the Connections: Make sure that all of the connections between the solar panels, voltage regulator, and USB port are secure and properly soldered. Loose or corroded connections can prevent the flow of electricity.
Verify the Voltage: Use a multimeter to measure the voltage output of the solar panels. If the voltage is too low, it may indicate a problem with the panels themselves or the way they are connected.
Inspect the Voltage Regulator: Ensure that the voltage regulator is properly connected and functioning correctly. If the regulator is faulty, it may not be regulating the voltage properly, which could damage your devices.
Test in Direct Sunlight: Solar chargers perform best in direct sunlight. If you're testing the charger indoors or on a cloudy day, it may not be producing enough power to charge your devices.
Check for Shading: Even partial shading of a solar panel can significantly reduce its output. Make sure that all of the panels are fully exposed to sunlight.
Inspect for Damage: Carefully inspect the solar panels and other components for any signs of damage, such as cracks, scratches, or loose wires.
Consult Online Resources: There are many online forums and communities dedicated to DIY solar projects. Consult these resources for troubleshooting tips and advice from experienced builders.
With a systematic approach and a little patience, you can usually identify and fix the problem with your DIY solar charger. Troubleshooting tips, solar charger repair, DIY fixes: don't give up! Let's get it working.
Listicle: 5 Reasons to Build a DIY Folding Solar Charger
1. Save Money: Building your own solar charger can be significantly cheaper than buying a commercially available one.
- Customize Your Charger: Tailor your charger to your specific needs and preferences, choosing the size, power output, and design that best suits your requirements.
- Learn About Solar Energy: Gain a deeper understanding of solar energy and how it works by building your own portable power source.
- Reduce Your Environmental Impact: Harness the power of the sun and reduce your reliance on fossil fuels.
- Enjoy the Satisfaction of DIY: Experience the satisfaction of creating something useful and sustainable with your own hands.
These reasons make a strong case for diving into this engaging and rewarding project. Solar benefits, DIY advantages, sustainability perks: what are you waiting for?
Question and Answer about DIY Folding Solar Charger
Q: How much does it cost to build a DIY folding solar charger?
A: The cost can vary depending on the components you choose, but a basic charger can be built for around $30-$50.
Q: How long does it take to charge a phone with a DIY solar charger?
A: The charging time depends on the size of the solar panels, the amount of sunlight, and the capacity of the phone's battery. It can take anywhere from a few hours to a full day to fully charge a phone.
Q: Are DIY solar chargers waterproof?
A: Most DIY solar chargers are not fully waterproof, but they can be made water-resistant by using water-resistant fabrics and sealing the connections.
Q: What tools do I need to build a DIY solar charger?
A: You'll need basic sewing supplies, a soldering iron, a multimeter, and wire strippers.
Conclusion of DIY Folding Solar Charger
Creating your own DIY folding solar charger is an incredibly rewarding project that combines sustainability, practicality, and a whole lot of fun. Not only will you have a reliable and portable power source for your adventures, but you'll also gain a deeper understanding of solar energy and its potential. From selecting the right components to troubleshooting common issues, this guide has provided you with the knowledge and resources you need to embark on your solar charging journey. So, gather your materials, unleash your creativity, and start building your own solar charger today! Your next adventure awaits, powered by the sun and your own ingenuity. You have now taken the first step towards making your own electricity with solar panels in a reliable and portable way.